Showing posts with label crafty. Show all posts

Wednesday, January 30, 2013

Lost Words : Reward!


I don't know where my words are. It seems they've gone into hibernation since experiencing true winter weather. I do recognize that I have long periods where I almost can't contain the thoughts and words and feelings that want to flow out of me into the ear of whoever will listen. And then I fold into myself to recharge. Things are simmering in this head of mine. I'm reading more and listening to the world around me, but not finding the words yet.  

So what do I do when my words are missing? 


I'm growing sprouts (or is that sprouting sprouts?). 


Puzzling over puzzles.


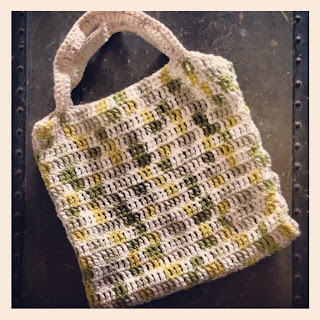
Trying out new crochet projects.


Playing mad scientist with my juicer.
This one I call "The Hot Shot"

Well, there you have it. I've been staying in a lot recovering from a cold and apparently acting like a grandma (crocheting AND puzzles??).  If any of you see a big gang of words causing trouble and starting grammar wars, please send them back to me. I will crochet you a beanie as a reward!


And my beanie's are rather awesome...

Thursday, December 6, 2012

Decking The Halls For Free

Snip Snip Snip (a holiday trader joes bag)

Glue Glue Glue (the strips into a chain)
Deck Deck Deck (the halls)


Sunday, December 2, 2012

Some Assembly Required

pine cones I had in a cupboard

yarn scraps 

little hoops from my jewelry making supplies

my first xmas decorations

merry happy day

Wednesday, October 3, 2012

I Can Do It: T-Shirt Yarn


Once in a while I actually do the projects in my DIY bookmark folder. Today I figured out the reason I put links in that folder and then rarely touch them.  I bet my older sister could tell you why I do this, but since she's not here to explain: I don't like being bossed.  "Do It Yourself" sounds like a command therefore I don't do it. Very simple. You are not the boss of me Bookmark Folder!  I don't have to crochet that afghan if I don't feel like it! That skirt can just go sew itself! I'll show you!!  

Anyone interested in making t-shirt yarn can follow this lovely tutorial...or not. It's up to you.

Wednesday, July 11, 2012

urban bag bag

urban outfitters reusable shopping bag
cut off handle

cut in half 

hem leaving small opening to thread elastic through.  sew up open side.

i cut an opening and stitched the edges so it wouldn't tear.

use cut off portion for hook

done. problem is it only holds about 20 of my gazillion plastic bags.

Wednesday, March 23, 2011

I'll Make It Myself: T-shirt Scarf

First I cut 6"x 6" squares out of random t-shirts I had already started cutting for other projects.  I ended up with 17 squares.

Step two was lining them all up and pinning them together. I wasn't very scientific about it knowing how it would just drape down when it's being worn meant I stressed less about the details.
After the squares were pinned, it was time to brave the sewing machine...I have a terrible habit of what I call "Pulling a Rachael" which is when I jam the sewing maching every single time I make something. It only happened once this time. So I just sewed a basic stitch straight(almost) down the lined up squares.
Voila! Recycled T-shirt Scarf.  I can't wait to wear this simple little scarf with a tank top and jeans maybe while I'm out riding my bike so It can blow in the breeze behind me.  You should try it too! I can't wait to try out other ways of dressing it up and playing around with this basic pattern. 

Wednesday, February 23, 2011

a little patchy re-style goodness


This week I found a skirt for $1 at my local resale shop.  It had a pin on the front that had made a little hole in the fabric and the back had "baby phat" emblazoned on it (sorry not a fan of ass-writing)...but this little black skirt looks like something I could live in during the warmer months so I gave the lovely sales lady my hard earned dollar and walked my un-emblazoned ass to Michael's for some iron on patches.  All the patches were expensive and for little kids so I bought the big square camouflage pattern patches that are sold for clothing repairs and such.  I only ended up using one of the two patches that were about $3.  


Skirt Front Before:


Skirt Back Before:


In Progress:


Skirt Front After:


Skirt Back After:


This little fix took me all of ten minutes once I had the iron heated up and found my sharp scissors.  I hope it inspires you to re-style some things in your closet that you aren't wearing right now.  Think outside the box.  What can you do to update something vs. buying something new?  

Creativity is free and free is cheap.

Thursday, February 17, 2011

I'm All Ears

I tackled a new project this last Christmas..tiny crocheted earrings. I was pleased with the way they turned out and plan on making more this year. my model makes them look even prettier (thanks steph).


I used crochet thread and sort of played around with a few different "flower" patterns until I found a few I could actually master and make look cute as earrings.  One of my favorite places to find new crochet and knitting projects is Ravelry (more thanks to Steph for passing along this website).  Most of the patterns are free and I love the search tools it offers...you can really narrow down your search to exactly what you are looking for down to the type and amount of yarn you have to work with.  So, if you've got scraps of yarn and thread going to waste it's time to put them to use!  Start making it a point of using up what you have even in your craft basket/closet/cupboard/drawer before you go buy more.  


Monday, February 14, 2011

Fetched & Etched

<a href="http://www.bloglovin.com/blog/2348976/barter-amp-scrimp?claim=8qp3vqt9ecc">Follow my blog with bloglovin</a>

Happy St. Valentine's Day! Today I want to share an easy gift idea for any occasion. The spices I like to use come in these great little glass jars that I was actually throwing away (horrors) when they could easily be made into something else or re-used for spices I buy that come in those annoying plastic bags or the bulk spice area.  I made this gift for myself but you could make it for a guy or a girl.  

Supplies: 
Empty glass jar (cleaned of all paper and glue residue..soak in super hot water and use a razor blade to scrape), Glass Etching cream, old paintbrush, Letter Stickers, tape, gloves.  

Just stick the letters on to say what you want.  I chose to make a little set that says "ODDS & ENDS" not sure what I was going to use them for.  Then tape off a square around the letters and really rub all the sticky areas down with the hard end of your painbrush so that the cream cant leak underneath. Put on your gloves, follow the instructions on the Etching Cream and let it sit. I think my instructions said five minutes but I got better results waiting more like 20 before rinsing it off.  I use a razor blaze (carefully) to get all the stickers and sticky residue off the jars.  Wash with soap and water and dry.  

Now go pick some wildflowers for yourself and don't forget it's okay to be your own Valentine...after all, we can't truly love someone else until we love ourselves first!!

(always feel free to ask questions here if i dont make something clear enough and please send pics of your own if you give this a shot!)

Saturday, February 12, 2011

scrimped valentine


Well Good Morning Scrimpers,
This morning I made a cute little card for my valentine using only things I had already and that most of you probably have on hand as well.  The store cards these days are adorable but so expensive! Most cards I fall in love with are at least $4.95 or even more (darn you Paper Source).  And as we all know, handmade is better!  So do what I did, gather together what you already have.  Think outside the box.  Can you use the back of that card someone else gave you if you glue it to some fancy paper?  Look inside your junk drawer and pull out a random twisty tie you saved or a scrap of ribbon you thought you might use again.  Use it! Okay without further rambling here is my cardmaking in pictures:


I gathered my supplies, a few scissors, glue, floss (yes really), old magazine, brown paper bag...


Next I tore out a few pages I liked and cut one in a big square and I cut a big square out of the paper bag for the inside.  I also cut out a few different sized hearts out of the magazine pages to use for added flourishes and yep, I totally used the floss as a little fancy on the seam. 


In all it took me about ten minutes and I didn't pay for anything! Now where is that valentine of mine...

             THE FINISHED PRODUCT